Okay, confession time: I might have a slight obsession with all things lemon. If it’s bright, zesty, and makes your taste buds sing, I’m all in! And let me tell you, these lemon bars are the ultimate sunshine dessert. My grandma used to make them every summer, and the smell alone brings back a flood of happy memories. They’re so easy to whip up – even with the kids “helping” (you know how that goes!). These are guaranteed to disappear faster than you can say “lemon curd!”
Why You’ll Love These
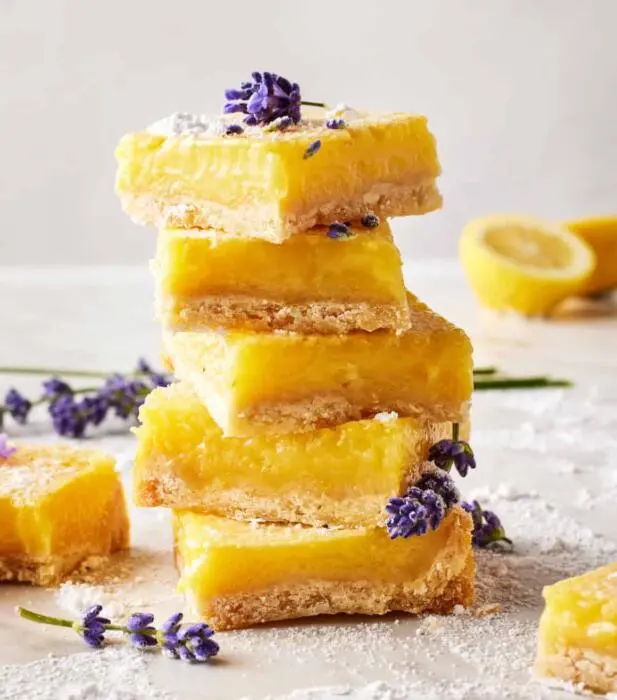
Seriously, what’s not to love? These lemon bars are bright, tangy, and the perfect balance of sweet and tart. Here’s why they’ll become your new go-to dessert:
Seriously Easy: Even if you’re not a baking whiz, you can nail this recipe. The steps are simple and straightforward.
Crowd-Pleaser: From potlucks to picnics, everyone loves a good lemon bar. Prepare to be the star of the dessert table!
Perfectly Tart: That zingy lemon flavor is what makes these bars so addictive. It’s like sunshine in every bite.
Make-Ahead Friendly: Need to get ahead? These bars are even better the next day, after the flavors have had a chance to meld.
Freezer-friendly: If you want to savor that lemon bliss, simply seal the bars for a later date.
Ingredients
For the Shortbread Crust:
1 cup all-purpose flour, spooned and leveled
⅓ cup powdered sugar, sifted (about 40g)
½ cup (1 stick) unsalted butter, melted
1 teaspoon vanilla extract
¼ teaspoon sea salt
For the Lemon Filling:
1 ½ cups granulated sugar
¼ cup all-purpose flour
4 large eggs
⅔ cup freshly squeezed lemon juice (from about 4-5 lemons)
1 tablespoon lemon zest (optional, for extra lemon flavor)
Powdered sugar, for dusting
How to Make
Get Started: Preheat your oven to 350°F (175°C). Line an 8×8 inch baking pan with parchment paper, leaving an overhang on the sides for easy removal. This is KEY – trust me on this one!
Make the Shortbread Crust: In a large bowl, whisk together the flour, powdered sugar, and salt. Add the melted butter and vanilla extract. Mix with a spatula or wooden spoon until a soft, slightly greasy dough forms. Don’t worry about the “greasy” part, that’s just the buttery goodness doing its thing.
Tip: Make sure your butter is fully melted but not hot. Hot butter can affect the texture of the crust.
Press the Crust: Transfer the dough to the prepared baking pan. Use your fingers to press it evenly across the bottom and about ⅛ inch up the sides of the pan. You want a nice, even layer.
Par-Bake the Crust: Bake the crust for 18-20 minutes, or until it’s lightly golden brown. Remove from the oven and immediately use a fork to dock the crust (poke holes all over). This releases any trapped air and prevents it from puffing up too much.
Make the Lemon Filling: While the crust is baking, prepare the filling. In a large bowl, place the granulated sugar. If you’re using lemon zest, massage it into the sugar with your fingers. This releases the oils and intensifies the lemon flavor. Trust me, it’s worth the extra step!
Whisk it All Together: Add the flour to the sugar mixture and whisk to combine. Then, whisk in the eggs until smooth. Finally, whisk in the freshly squeezed lemon juice until everything is well combined and no streaks of egg white remain.
Pour and Bake: Pour the lemon filling evenly over the hot, par-baked crust. Return the pan to the oven and bake for another 20-25 minutes, or until the filling is set. The center should be slightly jiggly but not liquidy.
Cool and Chill: Let the bars cool completely at room temperature for about an hour. Then, transfer them to the refrigerator to chill for at least 2 hours. This chilling time is crucial for the filling to set properly and for easy slicing.
Patience is a virtue, my friend! I know it’s hard to wait, but trust me, it’s worth it.
Slice and Serve: Once the bars are thoroughly chilled, lift them out of the pan using the parchment paper overhang. Place them on a cutting board and slice into squares. Dust generously with powdered sugar before serving. Enjoy the sunshine in every bite!
Tips & Tricks
Want to take your lemon bars to the next level? Here are a few of my favorite tips and tricks:
Use Freshly Squeezed Lemon Juice: Bottled juice just doesn’t compare. Freshly squeezed juice has a brighter, more vibrant flavor that really shines in these bars.
Don’t Overmix the Filling: Overmixing can incorporate too much air into the filling, which can cause it to puff up and then collapse while baking. Gently whisk until just combined.
Lining the Pan is Your Best Friend: Lining your baking pan with parchment paper ensures that the bars won’t stick and makes them super easy to remove.
Chill, Chill, Chill: As I mentioned before, chilling the bars is essential for the filling to set properly. Don’t skip this step!
Get Creative with Toppings: While powdered sugar is classic, you can also try topping these bars with fresh berries, a drizzle of glaze, or a sprinkle of toasted coconut.
Flavor Boosters:
Add a pinch of cardamom or ginger to the crust for a warm, spiced flavor.
Infuse your sugar with lemon zest a few days ahead of time for an even more intense lemon flavor.
Dietary Variations
Want to tweak this recipe to fit your dietary needs? Here are a couple of ideas:
Gluten-Free: Substitute the all-purpose flour in the crust and filling with a gluten-free blend.
Frequently Asked Questions
Why did my lemon bars crack?
Cracking can happen if the oven is too hot or if the bars are overbaked. Make sure your oven temperature is accurate and keep a close eye on the bars while they’re baking. They’re done when the filling is set around the edges but still slightly jiggly in the center.
Can I use a different size pan?
While an 8×8 inch pan is ideal for this recipe, you can use a 9×9 inch pan if that’s all you have. Just keep in mind that the bars will be slightly thinner and may require a shorter baking time. Keep a close eye on them!
Summary & Final Thoughts
There you have it – the perfect lemon bars recipe that’s sure to become a family favorite! Whether you’re baking for a special occasion or just craving a little bit of sunshine, these bars are always a good idea. I even made a batch last week when my daughter was feeling under the weather; the bright, tangy flavor cheered her right up! Don’t forget to bookmark this recipe or pin it for later – you’ll want to make these again and again. And if you try it, be sure to let me know in the comments below!
You May Also Like
If you’re craving more citrusy goodness, you absolutely have to try my Easy Lemon Cake Recipe! It’s so moist, flavorful, and perfect with a cup of tea.
Or, if you’re in the mood for something a little different, you might love these Fluffy Dream Pancakes. Top with your favorite toppings for a tasty weekend treat!

 1")
 2")
 3")
 4")
 5")
 6")
 7")
 8")


