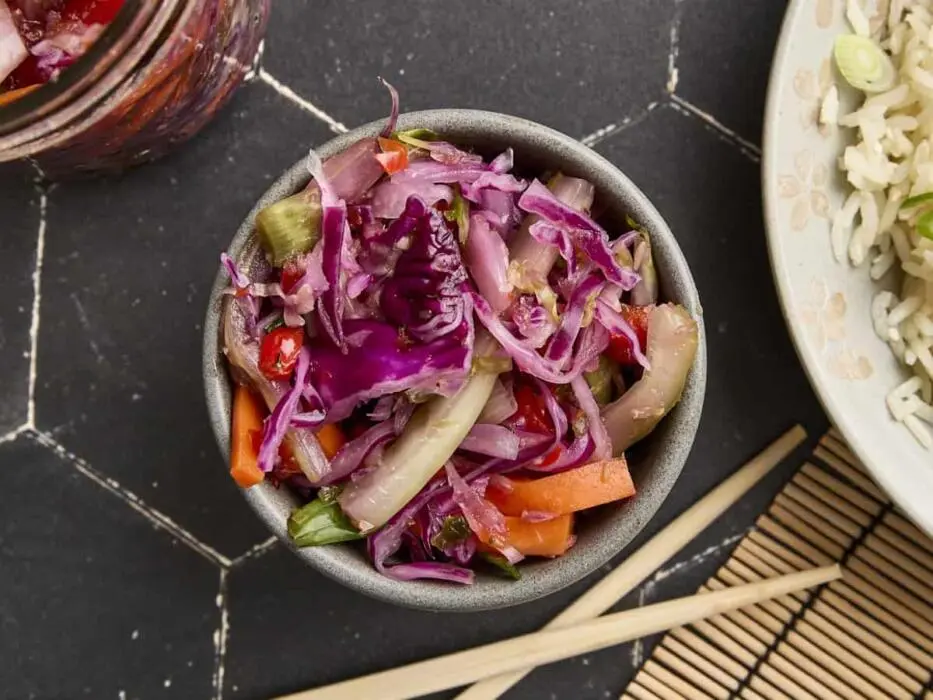

Kimchi. The mere mention of the word conjures images of vibrant red hues, the pungent aroma of fermentation, and a complex flavor profile that dances between spicy, sour, and umami. This isn’t just a side dish; it’s a cornerstone of Korean cuisine, a probiotic powerhouse, and a flavor bomb waiting to explode in your mouth. While store-bought kimchi is readily available, nothing compares to the satisfaction of creating your own batch at home. This detailed guide walks you through each step, ensuring a delicious and authentic kimchi experience.
The Art of Kimchi: Unlocking Fermented Flavor
Making kimchi might seem intimidating, but it’s surprisingly straightforward. The key lies in understanding the fermentation process and using fresh, high-quality ingredients. We’ll break down each step, from preparing the cabbage to creating the perfect spice paste, and guide you through the fermentation process, ensuring a kimchi that’s bursting with flavor and beneficial probiotics. Get ready to embark on a culinary adventure that will awaken your senses and introduce you to the magic of Korean cuisine.
Why Make Kimchi at Home?
- Control over Ingredients: You know exactly what goes into your kimchi, avoiding unwanted additives or preservatives.
- Customizable Spice Level: Adjust the amount of gochugaru (Korean chili flakes) to suit your preferred heat level.
- Freshness and Flavor: Homemade kimchi boasts a vibrant, complex flavor that surpasses store-bought versions.
- Probiotic Benefits: Fermentation creates beneficial bacteria that support gut health.
- Cost-Effective: Making kimchi at home can be more economical than buying it regularly.
Ingredients: The Foundation of Flavor
The quality of your ingredients directly impacts the final flavor of your kimchi. Seek out the freshest Napa cabbage and the highest quality gochugaru for the best results. Don’t skimp on the aromatics like garlic and ginger – they play a crucial role in creating the signature kimchi flavor.
- 1 large Napa cabbage (approximately 2-3 lbs)
- 1/2 cup kosher salt, plus more for seasoning
- 6 cups cold water, plus more for rinsing
- 1 cup Korean radish (daikon), peeled and julienned
- 4 scallions, trimmed and cut into 1-inch pieces
- 1/4 cup fish sauce (or substitute with soy sauce/tamari for vegan option)
- 1/4 cup gochugaru (Korean chili flakes), adjust to taste for spice level
- 1 tablespoon minced garlic (approximately 4-5 cloves)
- 1 tablespoon minced ginger
- 1 teaspoon granulated sugar
- 1 tablespoon sweet rice flour (glutinous rice flour)
- 1/2 cup water
Instructions: A Step-by-Step Guide to Kimchi Perfection
Follow these detailed instructions carefully to ensure a successful kimchi-making experience. Pay close attention to the salting and rinsing process, as this is crucial for drawing out excess moisture from the cabbage and creating the right texture.
- Prepare the Cabbage: Quarter the Napa cabbage lengthwise. Remove the core from each quarter. Roughly chop the cabbage into 2-inch pieces.
- Salt the Cabbage: In a large bowl, combine the chopped cabbage with 1/2 cup of kosher salt. Massage the salt into the cabbage until it begins to wilt slightly. Add 6 cups of cold water, ensuring the cabbage is fully submerged. Weigh down the cabbage with a plate or bowl to keep it submerged. Allow the cabbage to sit at room temperature for 2-3 hours, or until it has significantly softened and reduced in volume.
- Prepare the Rice Flour Paste: While the cabbage is salting, prepare the rice flour paste. In a small saucepan, whisk together the sweet rice flour and 1/2 cup of water. Bring the mixture to a simmer over medium heat, stirring constantly, until it thickens into a smooth paste (about 2-3 minutes). Remove from heat and allow to cool completely. The rice flour paste acts as a binding agent for the spices and adds a subtle sweetness to the kimchi.
- Rinse and Drain the Cabbage: After the cabbage has salted for 2-3 hours, rinse it thoroughly under cold running water at least three times to remove excess salt. Taste a piece of cabbage – it should be noticeably less salty than before. Drain the cabbage well and gently squeeze out any excess water.
- Prepare the Kimchi Paste: In a large bowl, combine the cooled rice flour paste, fish sauce (or soy sauce/tamari), gochugaru, minced garlic, minced ginger, and sugar. Mix well until a smooth paste forms. Adjust the amount of gochugaru to your desired spice level. Start with less and add more to taste.
- Combine Ingredients: Add the rinsed and drained cabbage, julienned Korean radish, and scallions to the kimchi paste. Using your hands (wear gloves to protect your skin from the chili!), thoroughly massage the paste into the cabbage and vegetables, ensuring everything is evenly coated.
- Pack the Kimchi: Pack the kimchi tightly into a clean glass jar or container, leaving about 1-2 inches of headspace at the top. Press down on the kimchi to release any air pockets. Pour any remaining kimchi paste over the top. Use a clean utensil to push the kimchi down to ensure it is submerged in its own juices.
- Ferment the Kimchi: Seal the jar or container loosely (do not tighten the lid completely, as gases will be released during fermentation). Place the kimchi at room temperature (ideally between 65-75°F) for 1-5 days, depending on your desired level of sourness. Check the kimchi daily. You’ll notice bubbles forming and the kimchi will start to smell more pungent. Taste the kimchi daily to monitor its progress.
- Refrigerate: Once the kimchi has reached your desired level of sourness, transfer it to the refrigerator to slow down the fermentation process. The kimchi will continue to ferment slowly in the refrigerator. Kimchi is best enjoyed after it has fermented for at least a week in the refrigerator.
Cooking Tips & Prep Shortcuts
Making kimchi is a rewarding experience, but a little planning can make the process even smoother. Here are some tips and shortcuts to help you along the way.
- Wear Gloves: Gochugaru can stain your skin and cause irritation. Always wear gloves when handling the kimchi paste.
- Use Fresh Ingredients: The freshest ingredients will result in the best-tasting kimchi.
- Don’t Over-Salt: Over-salting the cabbage can result in a kimchi that is too salty. Rinse the cabbage thoroughly and taste it to ensure it is not too salty before adding the kimchi paste.
- Use Clean Jars: Make sure your jars or containers are thoroughly cleaned and sterilized before packing the kimchi. This will help prevent unwanted bacteria from growing.
- Be Patient: Fermentation takes time. Allow the kimchi to ferment at room temperature for the recommended amount of time, and then refrigerate it for at least a week before enjoying it.
Prep Shortcuts
- Pre-Chopped Vegetables: Save time by purchasing pre-chopped Korean radish and scallions.
- Food Processor: Use a food processor to mince the garlic and ginger quickly and easily.
Flavor Pairings
- Korean BBQ: Kimchi is a classic accompaniment to Korean BBQ, providing a refreshing and spicy counterpoint to the rich, grilled meats.
- Rice Bowls: Add kimchi to rice bowls for a burst of flavor and a boost of probiotics.
- Stews and Soups: Kimchi adds depth and complexity to stews and soups.
- Sandwiches and Wraps: Use kimchi as a condiment in sandwiches and wraps for a spicy and tangy kick.
Make-Ahead Advice
The beauty of kimchi is that it only gets better with age! You can make a large batch and enjoy it for weeks to come. Kimchi can be stored in the refrigerator for up to several months. As it ages, it will become more sour. If it becomes too sour for your liking, you can use it in cooked dishes like kimchi jjigae (kimchi stew) or kimchi fried rice.
Variations, Regional Alternatives, and Dietary Substitutions
Kimchi is a versatile dish that can be adapted to suit different tastes and dietary needs. Here are some variations, regional alternatives, and dietary substitutions to explore.
Variations
- Cucumber Kimchi (Oi Sobagi): Made with cucumbers instead of Napa cabbage, this kimchi is refreshing and crunchy.
- Radish Kimchi (Kkakdugi): Made with cubed Korean radish, this kimchi is slightly sweeter and milder than Napa cabbage kimchi.
- Green Onion Kimchi (Pa Kimchi): Made with green onions, this kimchi has a milder flavor and a slightly slimy texture.
Regional Alternatives
- Jeolla-do Kimchi: Known for its use of a wider variety of seafood and a richer flavor profile.
- Gyeongsang-do Kimchi: Typically spicier and saltier than other regional variations.
- Gangwon-do Kimchi: Often includes ingredients like kelp and pumpkin, resulting in a sweeter and more savory flavor.
Dietary Substitutions
- Vegan Kimchi: Substitute the fish sauce with soy sauce, tamari, or a vegan fish sauce alternative. You can also add a tablespoon of seaweed flakes for umami flavor.
- Gluten-Free Kimchi: Ensure that the gochugaru you are using is gluten-free. Some brands may contain wheat flour. Use tamari instead of soy sauce.
Prep Time: 30 minutes (plus 2-3 hours salting time) Cook Time: 5-7 days fermentation Servings: Makes approximately 4-6 cups
A Probiotic Powerhouse and Culinary Gem
Homemade kimchi is more than just a delicious condiment; it’s a celebration of Korean culinary tradition and a testament to the power of fermentation. This recipe provides a comprehensive guide to creating your own batch of spicy, tangy, and probiotic-rich kimchi at home. Whether you’re a seasoned kimchi enthusiast or a curious beginner, this recipe will empower you to create a culinary masterpiece that will delight your taste buds and nourish your body. Experiment with different variations, adjust the spice level to your liking, and enjoy the endless possibilities that kimchi has to offer!
Frequently Asked Questions (FAQ)
- Q: How do I know when my kimchi is ready?
A: The best way to determine when your kimchi is ready is by tasting it. It should be noticeably sour and have a pungent aroma. You should also see bubbles forming in the jar. The fermentation time will vary depending on the temperature of your environment. Warmer temperatures will speed up the fermentation process, while cooler temperatures will slow it down. - Q: My kimchi is too sour! What can I do?
A: If your kimchi is too sour, you can still enjoy it in cooked dishes like kimchi jjigae (kimchi stew) or kimchi fried rice. The heat will mellow out the sourness. You can also add a pinch of sugar or a splash of vinegar to balance the flavors. To prevent it from becoming too sour, refrigerate it as soon as it reaches your desired level of sourness.


